Northstar V3: Student Import
Introduction
The Student Import feature allows users to create multiple student accounts in a single batch using an Excel template. This functionality is especially useful when creating secondary student accounts or importing large groups of students efficiently and consistently.
Getting Started
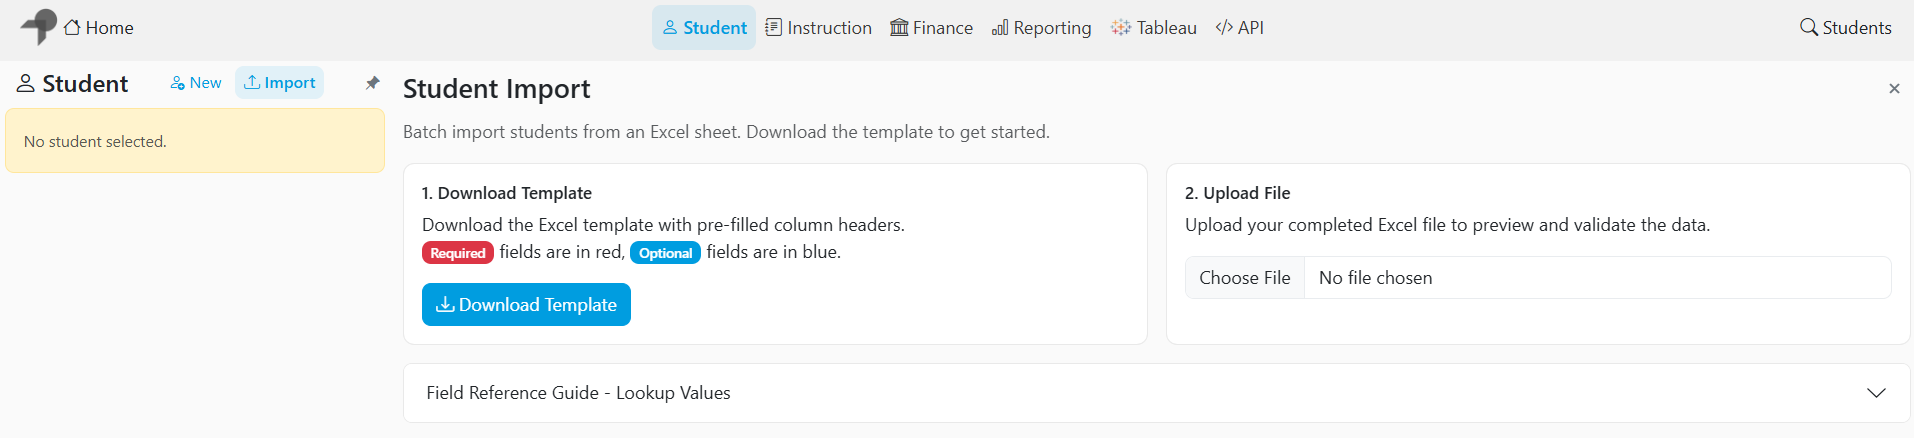
The Student Import feature is located under the Student category, next to the New student function.
To begin, select Import and download the provided Excel template.
- Required fields are highlighted in red.
- Optional fields are highlighted in blue.
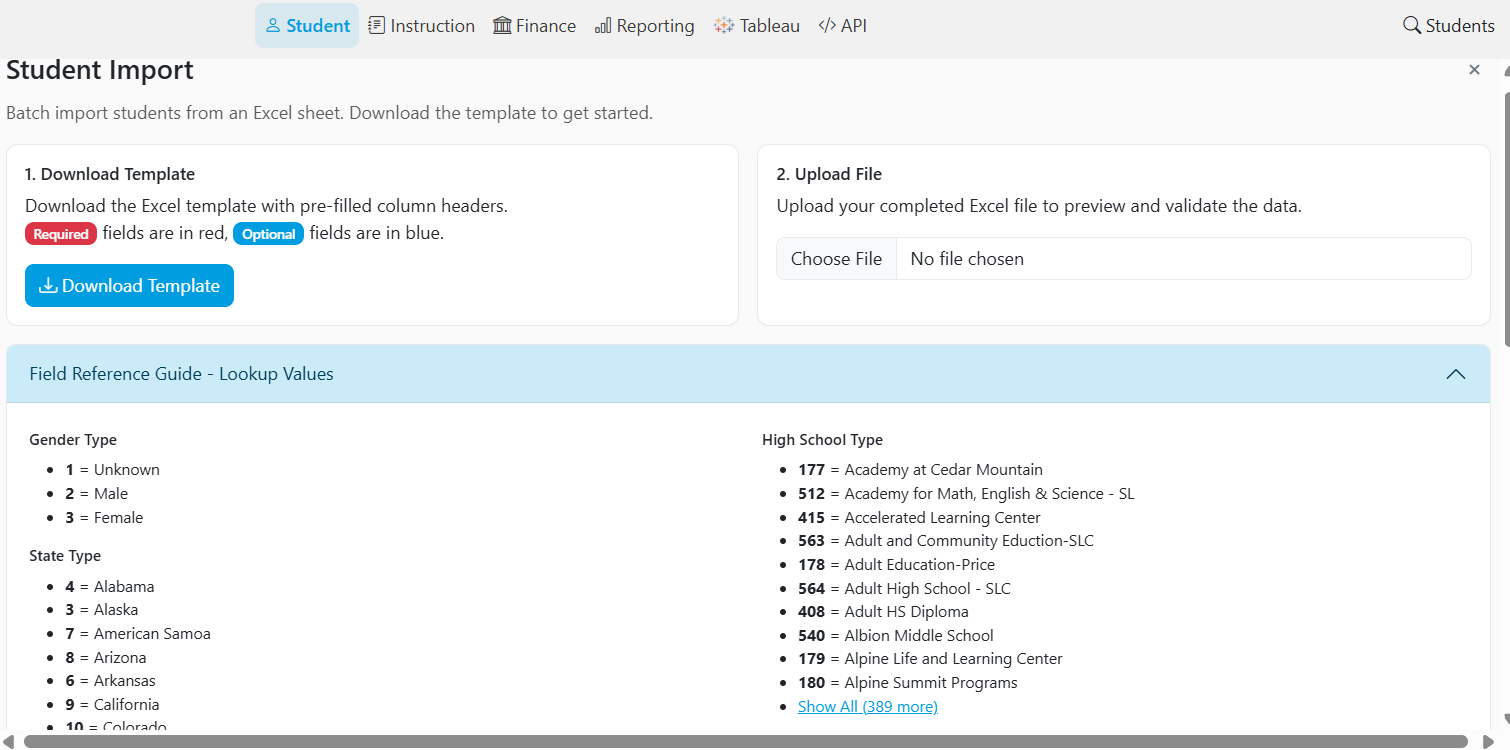
Complete the template by entering student data beginning on row 3. The first two rows contain field names and descriptions and should not be modified.

For fields that require type keys, refer to the Field Reference Guide to ensure the correct values are entered.
Once the template is complete, save the file and upload it to the Student Import page to preview and validate the data.
Validating and Importing Students
After uploading the file, the system will automatically validate the data and display any errors that must be corrected before proceeding.
- Validation errors will be listed for review.
- Once all issues have been resolved, a green check mark will appear in the Validation Errors column.
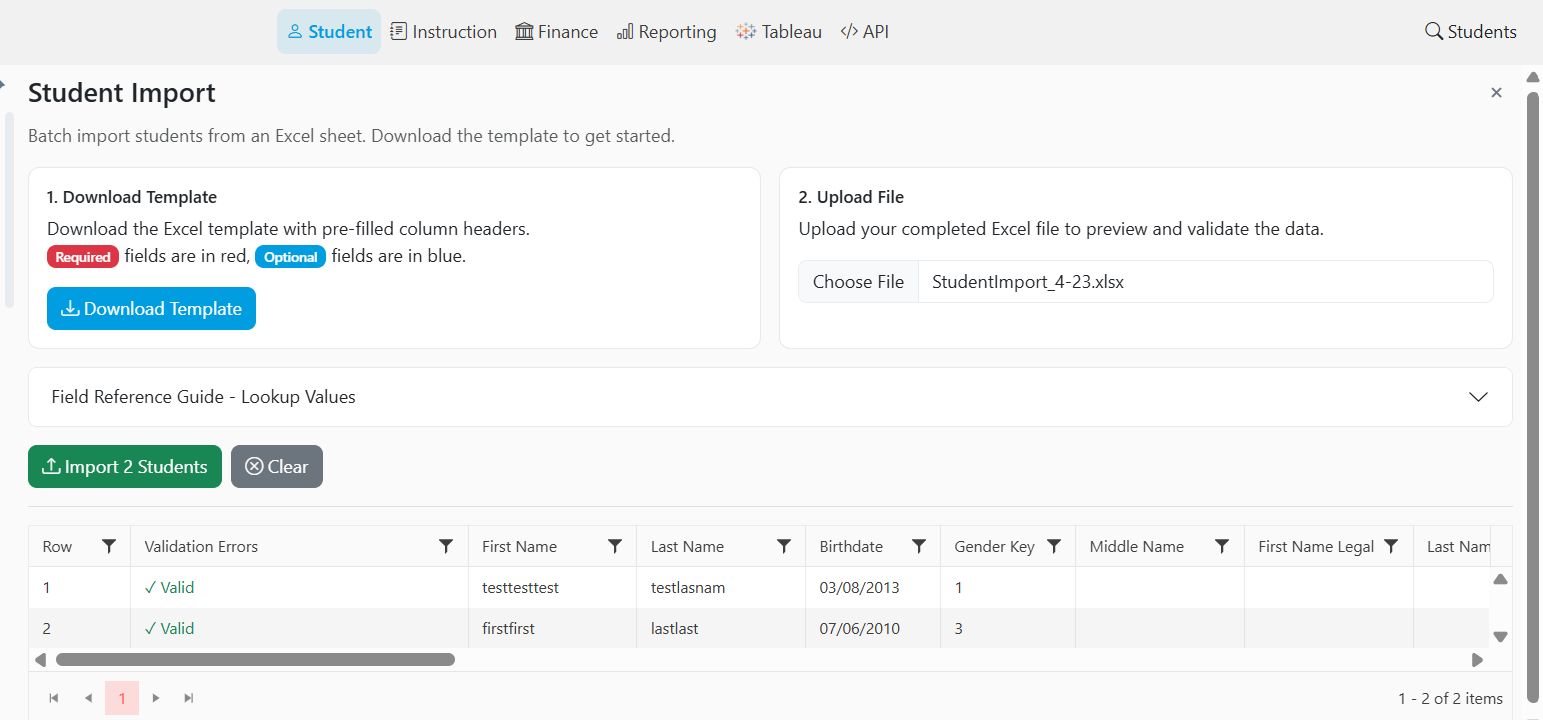
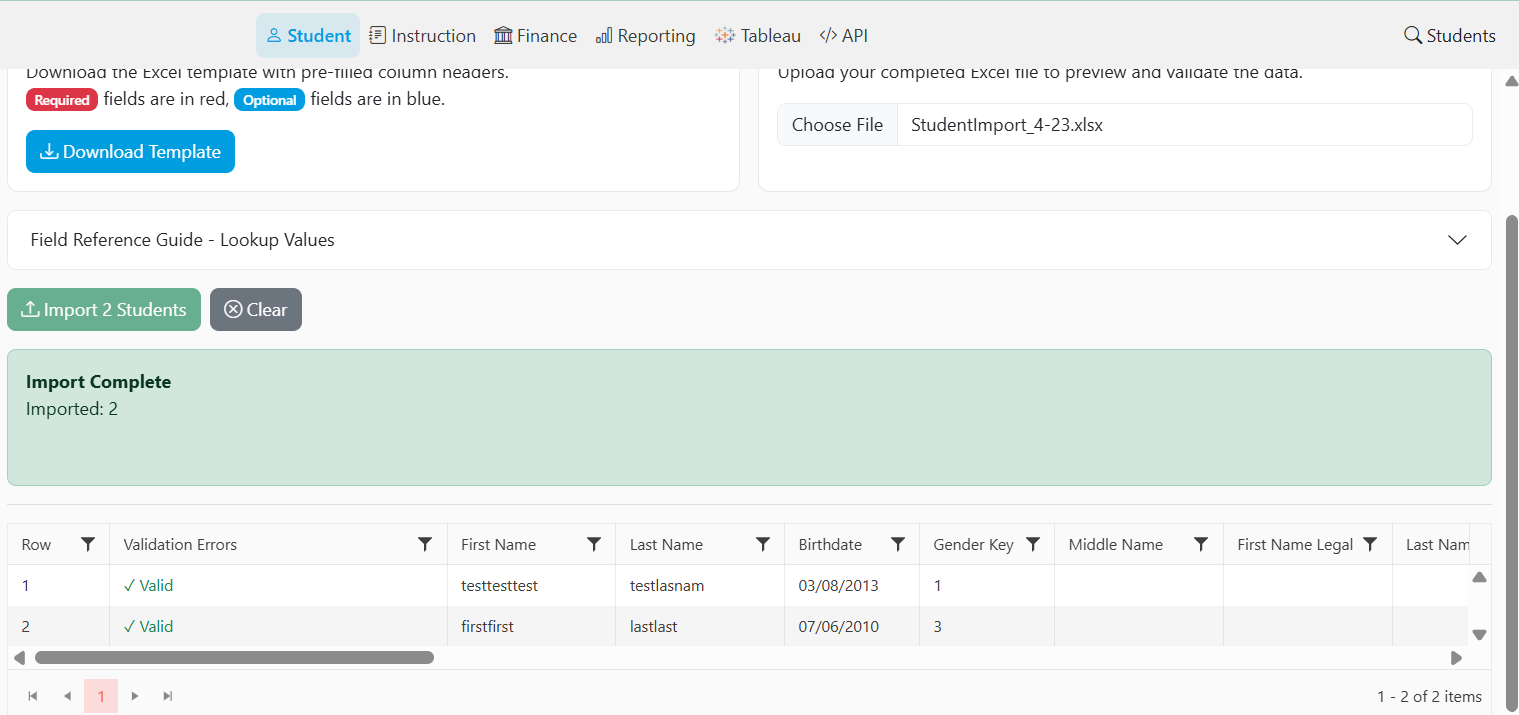
When validation is complete, select the Import Students button to begin the import process. The system will confirm when the student accounts have been successfully created.
Share Feedback
If you have questions, comments or feature suggestions, please submit them using the following form: https://forms.office.com/r/NreuhQX1Df or send an email to support@northstarmis.org
Your feedback is essential in helping us improve the new Northstar experience. Thank you for your support and participation!